
Introduction & Navigation
You have the ability to have multiple contact records open at any one time and can return to the Contact Record hub using the Hub icon in the top left.

At the top of each contact record is the contact name banner which will display their name (including a known as if one has been entered), the company they work for, their job title and the company’s terms status pill (see the Company Terms, Fees & Rebates article for further information). The colour the name banner information is displayed in is related to the colour assigned to the status (e.g. Client, Prospect etc. see the article Data | List Items).

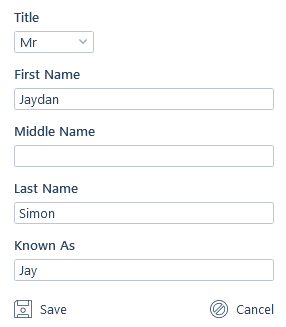
The contact’s name can be edited, and/or a known as can be entered by clicking on the contact’s name.
In the top right of each record, you will find: links to the contact’s social media accounts; functions to mark the contact as a favourite; record Refresh; the contact’s record ID number (which can be copied to your clipboard by hovering to the right of the number) and who and when the record was created. Additionally, if you have permission to you can archive or delete the record. If a contact was archived automatically as a results of the Company record being archived, once the Company record is restored the Contact record will also be restored.

Each record type in itris has an action bar with actions relevant to the record type. On the contact record this includes creating new appointments and comments, sending emails, actions relating to the submissions process and moving the contact. Please see the following articles for further information: New Appointments, Comments, Quick Comments, New Email Form, Using SMS, New Job, CV Marketing Hub, Submissions Area, Quick Placements, New Placement, Linking Applicant & Contact, Organisation Chart, Appointments Report, Posting to Ingetrations and Record Sharing.

Occasionally you may come across a contact that is moving to a company already on your database. Selecting Move Contact in the action bar will open up a New Contact form allowing you to enter their new details. See the Moving Contacts article for more information

Once the contact has been moved, they will display an icon allowing you to see and navigate to their previous companies.

Overview
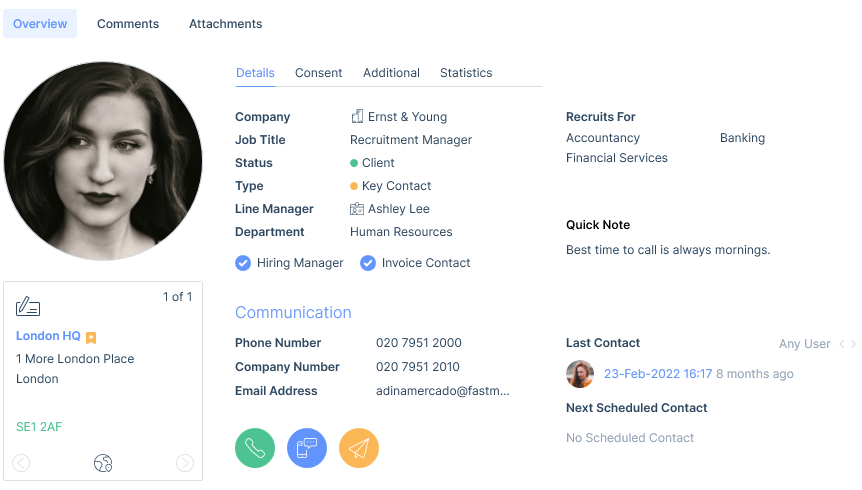
In the overview area, you are able to add a picture of the contact. If a picture is added it will be displayed in the circle and appear under the attachments, if no picture is added the circle will display with a colour related to their status and the contact’s initials.
As profile pictures are attachments against the record, in scenario’s where the contact record is created/linked from an applicant record, the profile picture may have a Data Access Group (DAG) applied to it. DAGs restrict users’ views and manage access to attachments. Please see the Attachments article for further information.
Below the picture their address(es) will be displayed, allowing you to easily view all locations.
Details
Some information in the details area is linked from the company record. For example, terms are taken from the Terms tab and departments are pulled over from the company information area (see the Company Record article).
The contact’s job title can be selected from a list created within the itris Management Utility (IMU), or it can be free typed. Please see the article Data | List Items for more information.
The contact status can be updated by clicking on the status itself. Assigning a contact with a status will aid in searching, especially if you are searching your database for all key contacts. A colour is associated with each status and will impact how the name banner is displayed. See the article Data | List Items.
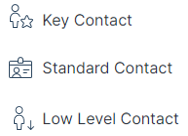
Type will display the contact’s type with a colour icon, assigning your contact with a type will be of great benefit for categorising your contacts to assist with business development searches:

The following icons will also display in the name banner according to the contact type selected:
Line manager will display the contact’s Line Manager, this can be selected at point of creation or at a later stage.
Departments are created in the itris Management Utility (IMU) or they can be created on the Company Record, you will be able to select from the list to display the department the contact works in (see Data | List Items article). This can also be selected at point of creation or at a later stage.
You can also record whether the contact is the hiring manager and/or the invoice contact. These are searchable.
Recruits For will show a list of job functions that the contact recruits for. You will be able to select multiple Job Functions. See the article Data | List Items for more information on Job Functions.
The quick note is often used to display a short, but important/relevant note about the contact that is useful or important to know, this is also a searchable field. If you have permissions to you are able to the quick note as a warning which will mark it as red on the record, you can find out more about permissions in the article User Management | Permissions.
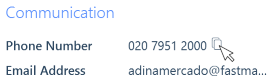
Under Communications, the contact’s default telephone number and email address will be displayed. These items and the icons below are quick links, for example, clicking on the email address or email icon will open the email form (see the Communication Assignment article). You can also copy them to your clipboard by hovering to the right of the entry and clicking onto the copy icon that appears.
This area also displays the last contacted date, where you can switch between the last date you contacted the contact, or any user contacted the them. This gives you a quick view of communication activity against the contact record. Please refer to the article Data | List Items on how to set comments to update last contacted date.
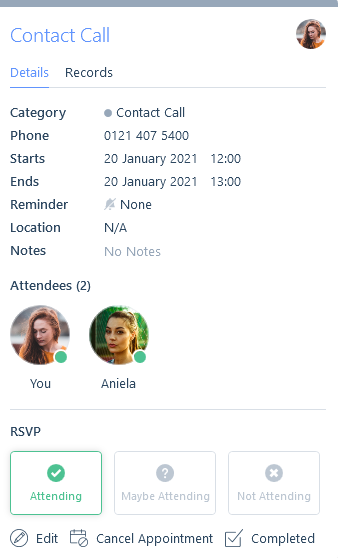
The Next Scheduled Contact date is determined by the date and time of the first appointment where the contact is an attendee, and the appointment starts today or in the future. Appointments with the type of “General” are not included. When the “Just Mine” filter is applied, only appointments where you (the current user) are an attendee are displayed.
From here you have the ability to edit, cancel or complete the appointment, by hovering over the Next Scheduled Contact and clicking the view icon the Appointment Card will appear.

Consent
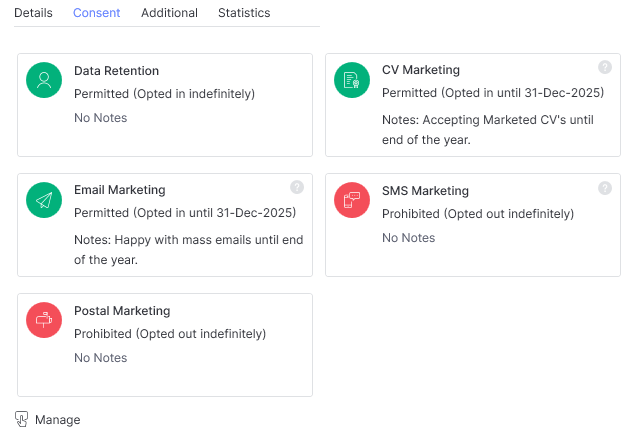
The consent tab is where you can set the contact’s Retention and Marketing Preferences.
It is worth noting that if a contact has opted out of a particular marketing preferences, for example email, this will not stop you sending communications via that route on an individual basis, e.g. a direct email just to the contact. Contact marketing preferences can also be driven by a company-wide default setting on the company record.
For more information on Consent, please see the article Retention Consent & Marketing Preferences.
Additional
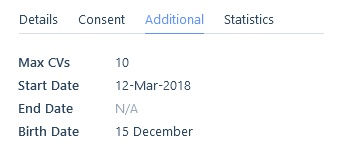
The Additional tab will display the max number of CVs the contact would like to be sent to them per job and their start and end date at the company. You will also find the contact’s birth date here, you can choose whether or not the year of birth shows in the itris Management Utility, see the article Settings | General Settings for more information.
Recording at the very least the birth date will result in contacts showing within the Active Business Intelligence dashboard, Contact Birthdays area where applicable, providing the opportunity to improve rapport and potentially differentiate your businesses customer service. See the Dashboard | Active Business Intelligence article.
Statistics
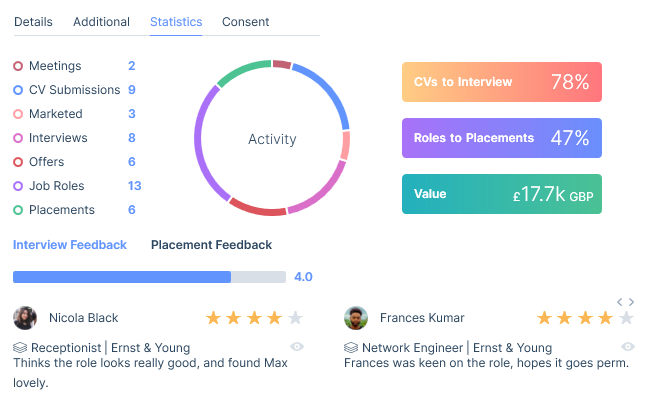
The statistics tab gives an overview of recruitment activity against the individual record, including feedback on any interviews and placements, giving you an overview and visual representation of actual activity against that record. Please see the Statistics | Applicant & Contact article for further information.
Information area
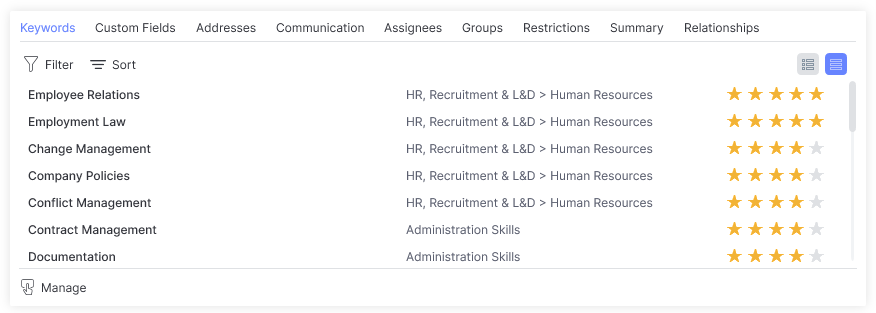
In the bottom left of the overview tab is the information area, where you can add further information to the record. Each tab in the information area has a separate article covering its functionality, please see the following articles: Keyword Assignment, Custom Field Assignment, Addresses, Communication Assignment, Assignees, Record Groups, Restrictions, Relationships, Summary.
Jobs & Placements
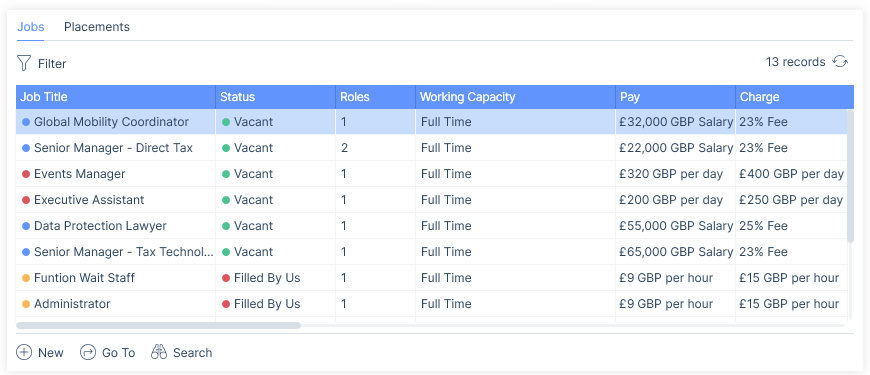
In the top right of the overview tab, you will find all jobs and placements associated with that contact. From here, you can navigate to the relevant records, or create new jobs.
For further information, please see following articles: Job Record, New Job, Placement Record, New Placement, Converting & Focused Searches.
Filters
Each tab contains its own ability to filter allowing you to adjust the view, you can even set a default filter.

Submissions area
The submissions area tracks and manages certain stages of an applicant’s submissions associated with that contact (CV submissions, Interviews and Offers). Additionally, it will also track when an applicant is marketed to the contact.
This area is essentially a mechanism that allows you to submit an applicant, and move them through the submission levels based on their successes.
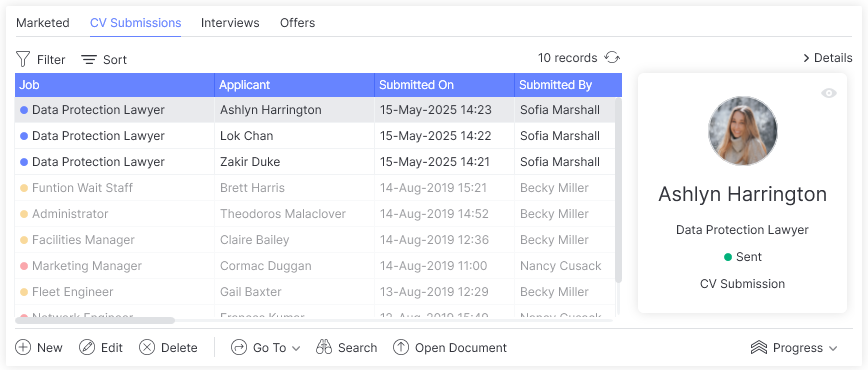
Please see the articles for CV Marketing Hub and Submissions Area for further information.
Comments
Comments are a useful tool for tracking communications with a contact, and recording comments allows for the smooth flow of information and transparency. Depending on your email settings, in addition to comments you manually add, you may find emails sent to and received from the contact display here also (with the email additionally visible via the attachments area). Please see the Comments article for further information.

Attachments
Attachments are an integral part of any database software, particularly in recruitment. Depending on your email settings, you can have emails sent to and received from the contact display here. Please see the Attachments article for further information.
