The CV Marketing Hub is a dedicated area within itris 9 that allows you to send one or multiple applicant CVs to one or multiple contacts in situations where a job does not exist.
To access the CV Marketing Hub use the icon in the Navigation bar.

Adding Recipients to a Marketing Event
The CV Marketing Hub is divided into two sections, on the left is the area where you will add and manage the applicant and on the right is the area for managing contacts.
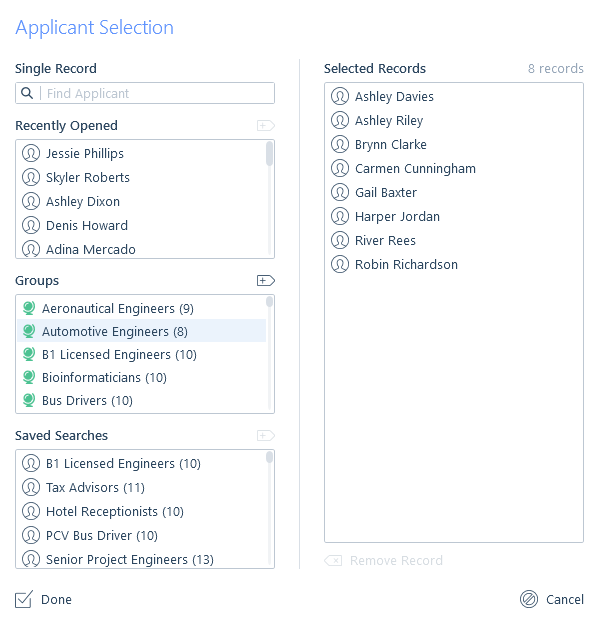
When adding applicants and contacts via the Assign button in the CV Marketing hub you have a variety of options on where to get them from. You can choose from one or more or any combination of these options.
- searching for individual applicants/contacts
- recently open records
- groups
- saved searches
Records can also be added to the CV Marketing Hub from Applicant/Contact Groups or Searches areas using the Submit button.
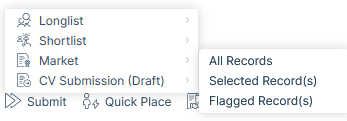
Additionally, on both Applicant and Contact records is the Market CV button.

Applicants
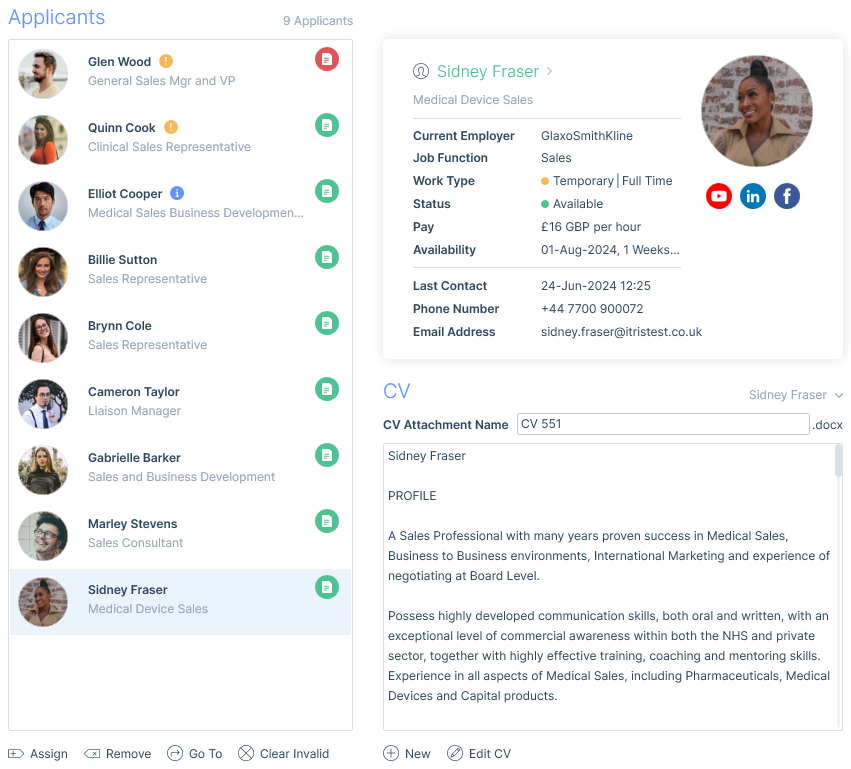
Once the applicants are added, you can select the applicant to see their record card, and beneath that select a CV to send.
Selecting a CV
The CV to market can be selected from the Select CV drop-down list.
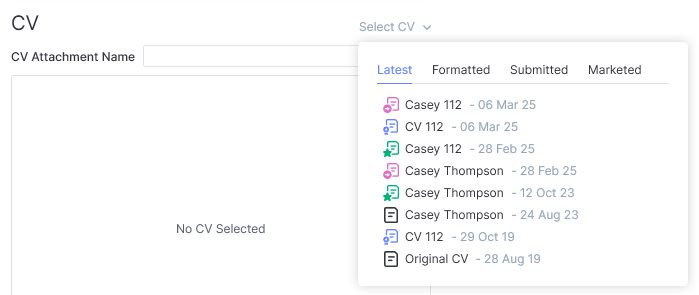
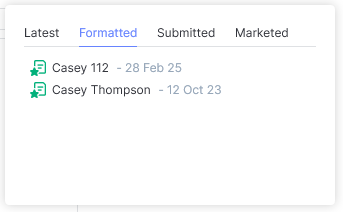
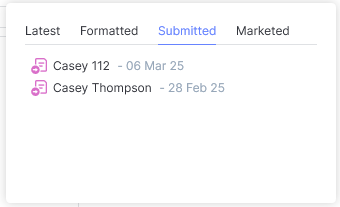
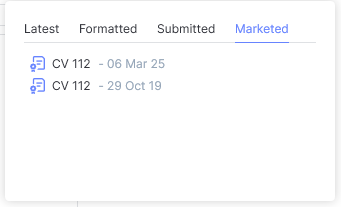
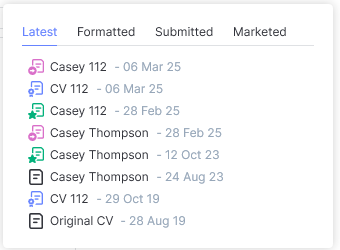
This list is divided into tabs for the different types of available CVs, which are also depicted by the different icons for ease of reference. It shows the following types of CVs:
Formatted CVs
Submitted CVs
Marketed CVs
Original CVs
If allowed, these will show on the ‘Latest’ tab with the black icon. See the Settings | General Settings article for more details on allowing this type of CV to be submitted.
Alternatively via the New button a CV saved outside of itris or within your recent emails can be used, or via the From Template tab a new formatted CV can be created. Please see the Word Templates article for more details on how to create a formatted CV this way.
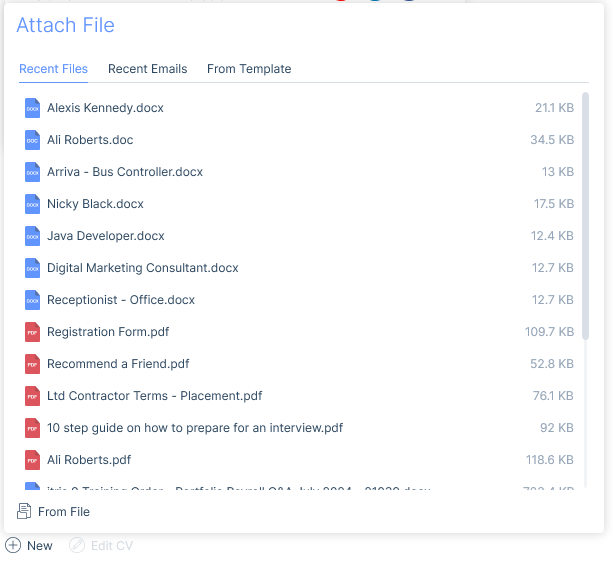
Once added, the CV can be edited too, this will create and attach a new Marketed CV to the applicants record (attachments tab).
The CV Attachment name will reflect the ID number of the applicant and can be changed if required. Additionally, once sent this marketed CV will be attached to the applicant’s record.
Once a CV is selected the CV icon next to the applicant’s name will turn green. You will need to assign a CV to all the applicants before submitting.
Data Access Groups
CVs are essentially attachments and therefore may have Data Access Groups (DAGs) applied to them. DAGs restrict users’ views and manage access to attachments. Therefore, when selecting CVs for Marketing you will only see CVs you have access to unless the attachment currently selected is hidden from you (e.g. it’s the most recent formatted CV), it will still show it as selected and you will need to choose another CV.
Please see the User Management | Data Access Groups and Attachments articles for further information.
Contacts
As with the applicants, once the contacts are added, you can select a contact in the list to see their record card.
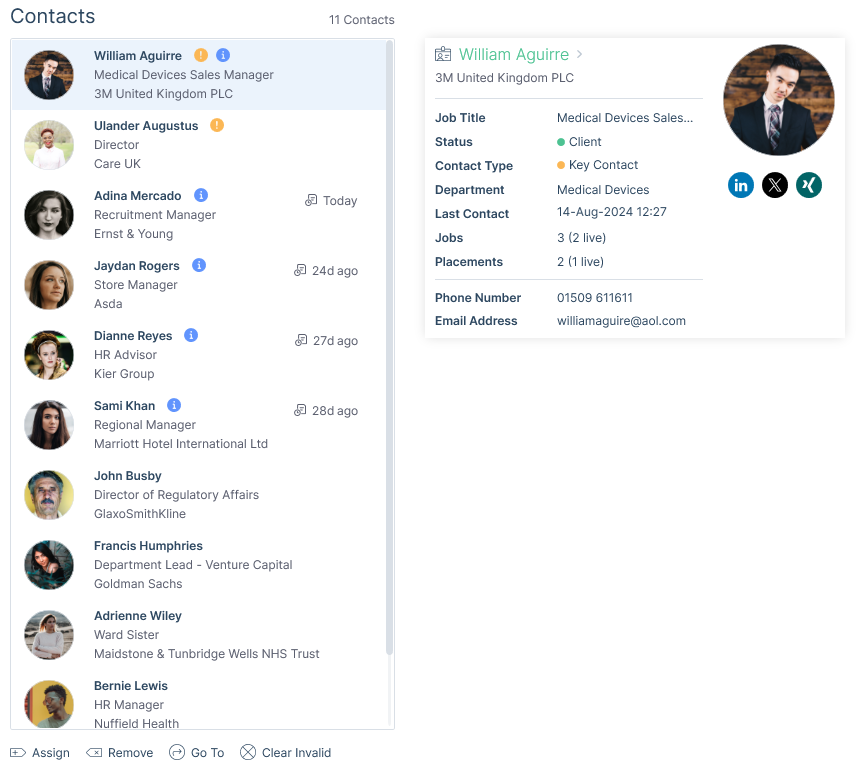
Warnings
If there are any warnings you should be aware of (applicant and/or contact), these records will appear at the top of the list with the warning symbols displayed next to them. These will be both Restriction and Informational warnings. Hovering over the icon will display details of the warning.

If there are restriction warnings, these will either need to be resolved on the relevant record or the person will need to be removed which can be carried out via the Clear Invalid button at the foot of either the applicant or contact area before proceeding.

Please see the Submission Warnings article for more information.
Market CV Frequency Warnings
Market CV Frequency Warnings are designed to inform or prevent users from Marketing CV’s to contacts too frequently, and reduce the risk as being seen as spamming contacts. The timeframe (minimum number of days) in which contacts can be sent a marketed CV and whether it is an informational or preventative restriction is managed via the itris Management Utility, please see the Settings | General Settings article for more details on how to set these up.
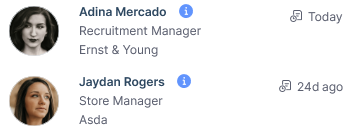
If a selected contact has been marketed to within the timeframe this will be displayed on the contact marketing card along with the number of days since the contact was last marketed to.
Submitting Marketed CV’s to a Marketing Event
Once every applicant has a CV, and all the records are valid (for example you’ve removed or resolved those with restrictions) you will be able to Submit. You have options for sending via email or externally (for example you’ve had a meeting with a client and taken hard copy CVs of the types of applicants they might be interested in).

Ensure you give a Campaign Name to the marketing event as this will be used later.
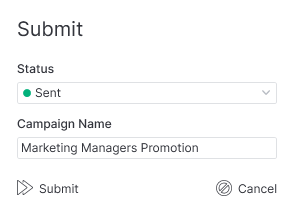
If you are sending via email once you’ve submitted, an email will open. This is one area where you may find email templates and merge fields useful. Please see the articles in the Communication category to assist you further.
Whether or not you are using an email template, the itris email functionality means you will be sending the emails individually to each contact.
If you return to the CV Marketing Hub without sending the email you will be alerted that an email is currently being drafted for this CV marketing submission. You will either need to send or cancel the email to make changes or start a new CV marketing submission.
Once the marketing submission is completed, either via email or externally, in the submissions area of an applicant, company and contact you will see the marketing events relevant to that record.
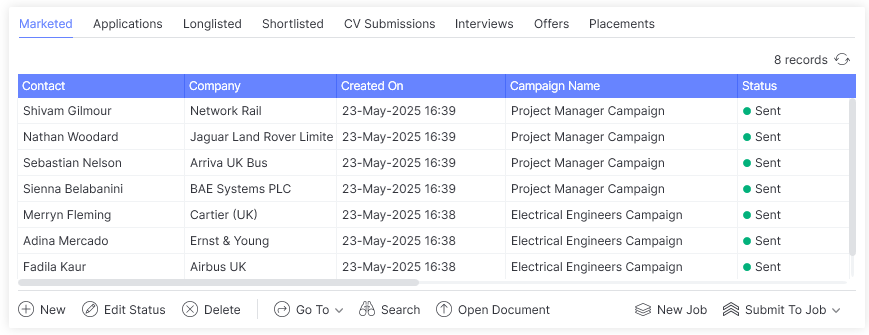
Marketed CV events are also reportable, see the Marketed CVs Report article for more details.
Creating a Job from a Marketing Event
On those welcomed occasions when a contact comes back to you after you’ve sent them a marketed CV to give you a job, you can use the associated marketing event to create the job. From the Marketing tab of the relevant applicant, contact or company is the option to create the new job.

During the creation of the new job (see the New Job article for more information) you will notice under the Additional tab that the marketing event is selected.

Once the job is created, the Marketing tab will list all the applicants involved in that marketing event, from here you can progress any applicant through the submission process. Clicking Submit to Job will first show any job linked to the marketing event (which could be at more than one company) before allowing you to go to any stage of submission. Please see the Submissions Area article for more information.

Linking a Marketing Event to an Existing Job
There may be occasions where you want to link a marketing event to an existing job, and this can be done via the Additional tab of the job.
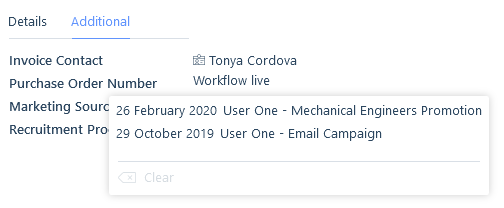
As with creating a job from a marketing event, the Marketing tab will list all the applicants that were involved in that marketing event, and from which you can progress applicants through the process.