itris preferences are accessed via the Preferences icon in the Action Bar.

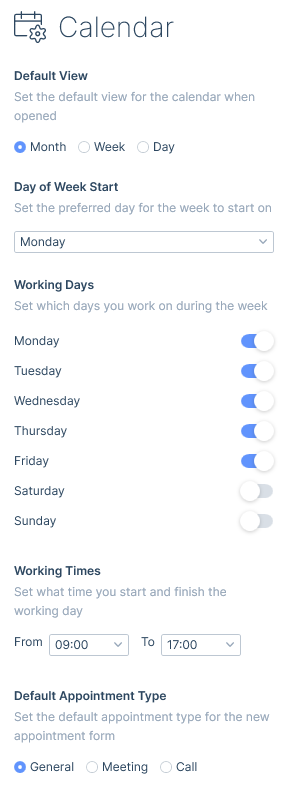
Calendar
Here you can configure your default view for the calendar including your preferred day for the week to start and your working days and times. Additionally, you can set your default Appointment type.
Email Preferences is where you link your Outlook account to itris, set your default email signature and choose whether or not to automatically execute a merge when selecting an email template. These settings are unique to each user.
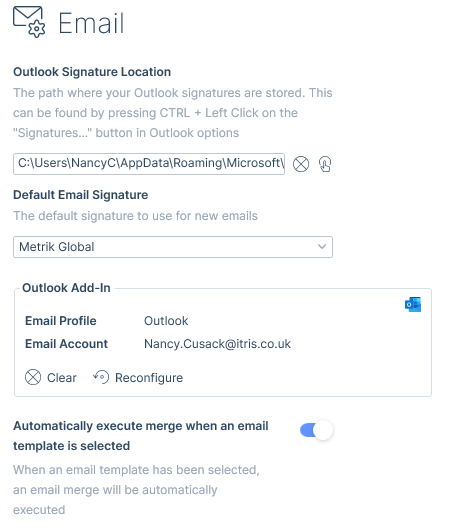
For more information on setting up the Outlook Add-In please see the article Getting Started with New Users.
General
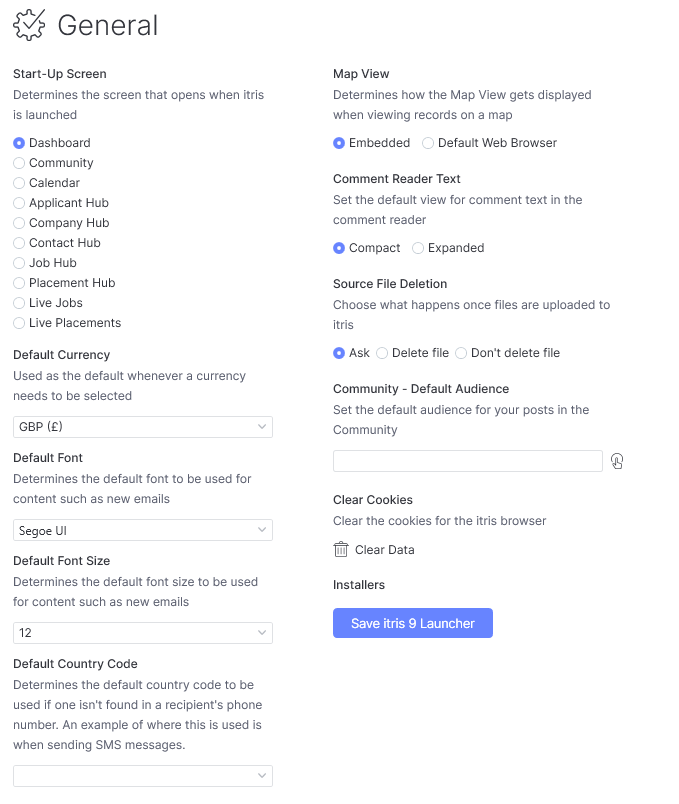
There are several settings here that will impact itris, such as your default currency, fonts and whether source files are deleted when uploaded to itris.
Additionally, you can choose how your map view displays (embedded within itris or open in your default browser), how your comments display (compact mode will show the first 4 lines of a comment with the option to expand), your start-up screen and your default audience for posting in the community hub.
You also have the ability to download the installer for the current version of the itris Launcher. Please see the itris Launcher | Log in article for more information.
If you are changing your Default Currency, you will need to log out and back into itris for this to take effect.
Integrations
The Integrations area displays all the Integrations available within itris. Clicking on a tile will take you to a Knowledgebase article to learn more about that integration.

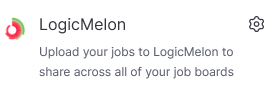
Those with a Cog in the corner of the tile loads the user configuration area for this integration, for example to enter your LogicMelon and Broadbean Account details (if you have any accounts with them) and preferences, which will be used when posting jobs via these job board aggregators.
Main Records
To allow for a tailored layout you are able to customise the main record forms in itris. There are two ways you can customise the main records:
- Re-order the tabs within a container
- Hide tabs that you don’t want to see
Additionally, if you are working on a smaller screen where the containers are displayed in a vertical configuration you are able to re-order the containers.
These options will help you easily access the areas most useful to you, to streamline your workflow and increase your productivity.
For each of the main record forms, you are able to drag and drop tabs into the required order and/or tick to include a tab in a container.
There is a reset option to return to the system default at any time.

Small Screen Re-ordering
When working in small screen mode (<1080p resolution) the containers are displayed vertically. You are able to move these up and down depending on your preference via the up/down arrow to the right of each container.

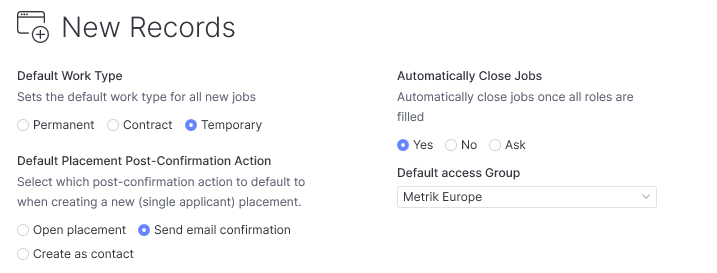
New Records
Here you can choose the default Work Type for when creating new jobs, and the default action when saving a new Placement, e.g. to simply open the Placement form, send an email confirmation or create the placed applicant as a contact at the company.
Additionally, you can choose what happens to a job when you fill all roles.
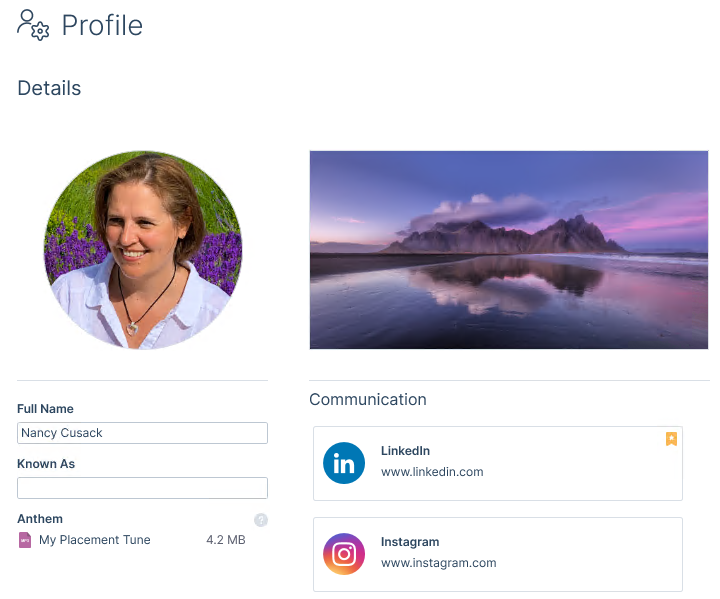
Profile
The itris user profile is where you can enter details about yourself to personalise itris, your profile image and user record card displays in several places around itris, including at login and on records you have created.
The details entered make up your user Record Card, which is visible to other users, for example, if you are an attendee to an appointment, your record card will be visible against that appointment in Scheduled Calls.
Clicking on another users image in itris will reveal their record card, this could be very useful if you need to contact a colleague about a job created in itris for example.
You can upload a profile image for use against actions in itris such as on the Assignee’s screen, a known as name in case you are referred to by an alias of your full name, and links to your social media such as LinkedIn.
Additionally, if you are using Powerboards and allow for personal anthems to be played on placement Shout Out slides your personal anthem can be uploaded here. It must be in .mp3 format.
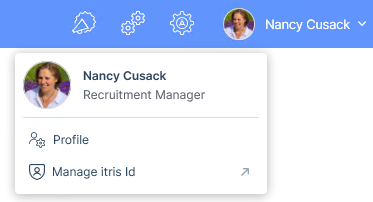
You can also access your Profile via your name on the Action bar.
Searching
You can configure a selection of preferred settings for your searching experience, such as automatically having searches Pop Out and your preferred unit for distance.
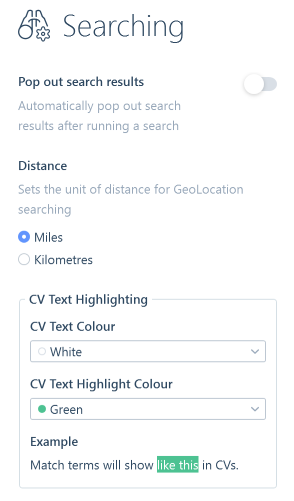
CV Text Highlighting
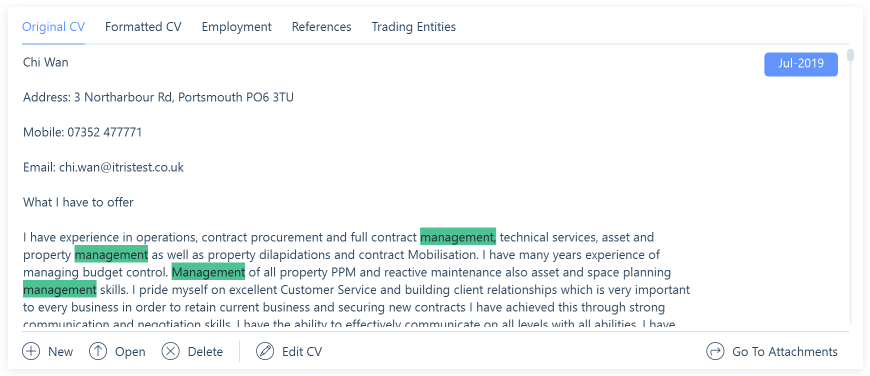
When performing a CV text search the matched terms you have searched will be highlighted in the Original CV window on the Applicant record. Making it easy to visually see how many times the terms appear in their CV.
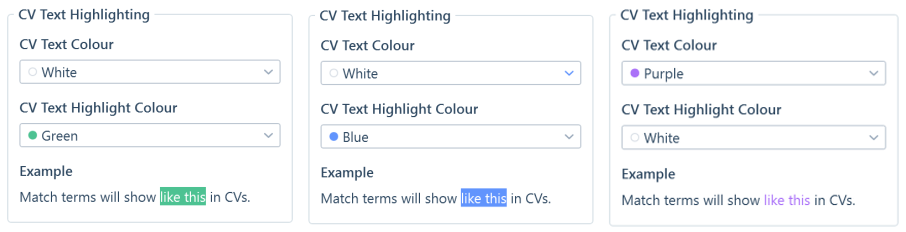
From here you can select your preferred foreground and background colour. This is particularly useful if you have difficulty seeing certain colours.
There are multiple colour combinations available.
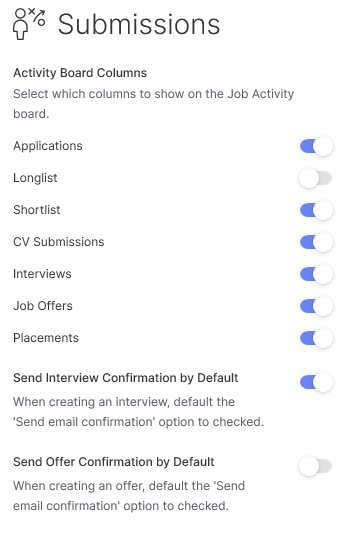
Submissions
Here you can set which submission levels (lanes) will show, see the Job Activity article for more information. Additionally you and set to automatically launch emails to send to contacts and applicants to confirm interviews.
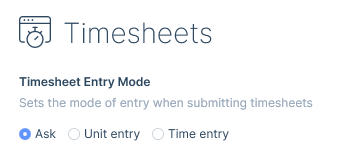
Timesheets
Here you can configure your default Timesheet Entry Mode.
Unit Entry mode is used for adding units (e.g. 8 hours / 1 day) to specific rates within the timesheet’s period.
Time Entry mode is used for adding working times (e.g. 0800-1700) to specific rates for the timesheet period.