Starting Points & General Information
There are a number of places from which you can start creating a job record.
- You can choose to open the new job form using the option in the Main Menu.
- You can create new jobs via the New Record Hub, accessed via the Navigation bar (see the New Record Hub article).
- When in the process of creating any new record you can click the plus icon in the top right.
- You can create a new job using the New Job button on a Company’s or Contacts action bar. If selecting from this route, the company/contact details will be automatically populated.
- From the job tab on a contact record, you can click New Job. If selecting from this route, the company & contact details will be automatically populated.
- From the job and contact tabs on a company record, you can click New/New Job. If selecting from this route, the company/contact details will be automatically populated.
- From a relevant email in the inbox, you can choose to create a new record. This is probably the most common route if you have been sent a job spec, see below for more details.
- You can duplicate an existing job to create a new one.
Whichever route you take to start the creation of a new job you will first be presented with the Work Type selection window where you will need to select the Recruitment Type and Work Type. There are two Recruitment types;
- Contingency recruitment is the most common type of recruitment and results in a fee when the client hires someone.
- With Retained recruitment, the fee can be broken down over a number of stages throughout the recruitment process. For more information see the article Retained Recruitment.
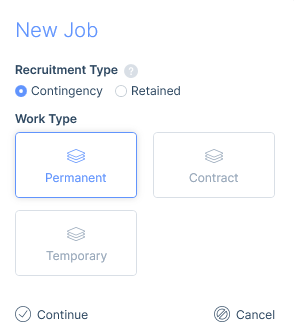
In addition to Work and Recruitment types there are several other system mandatory fields when creating a job record as shown below, however, you can stipulate additional fields to be mandatory in the itris Management Utility (IMU), please see the Settings | Mandatory Data article for more information.
- Job Title
- Company Name (in some cases this is automatically populated)
- Contact Name (in some cases this is automatically populated)
- Pay/Charge (these can be zero)
- Address (selected from the Company addresses)
The Recruitment and Work Type are displayed under the details tab of the new job form.

Creating the record
When you have entered all the mandatory details and any additional information you will be able to create your job record. If any fields require validation or mandatory fields have not been completed the Validation (exclamation mark) icon will show.

Creating a job from email
Once you locate the relevant email within your itris inbox you’ll have the Create New option, where you can choose to create the new job from the email body text or an attachment (e.g. the job spec). If you are choosing to create the job from an attachment itris will automatically attach the document under the Job Descriptions tab, as well as use the text within the document to populate the overview.
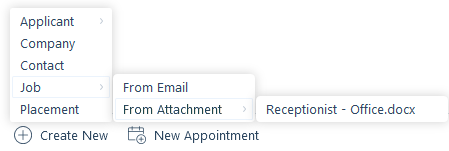
When adding a job record from an email, you will get an additional tab in the creation window called Email, from here you can drag and drop (or copy and paste) data into the new job window. This will be useful if the email includes additional information about work hours, pay and charge etc.

Details
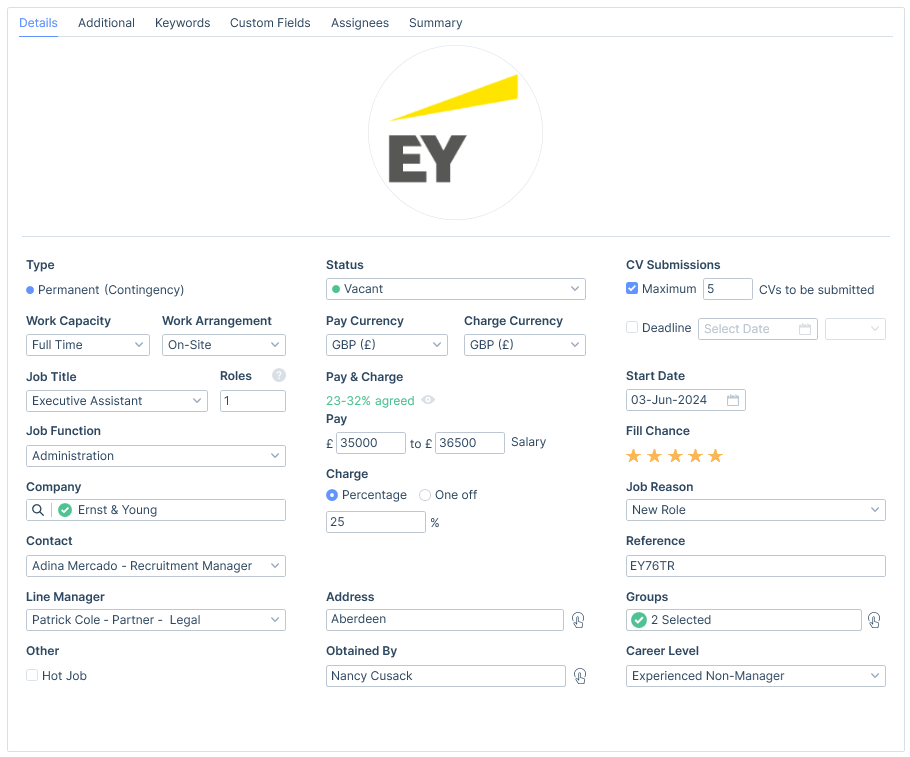
There is a plethora of data fields available in the details area, much of which can be used for searching, such as Work Type (see below for more information), Work Capacity (Full or Part time), Work Arrangement (On-site, Hybrid or Remote), Job Title, Status, Career Level and Client Reference etc.
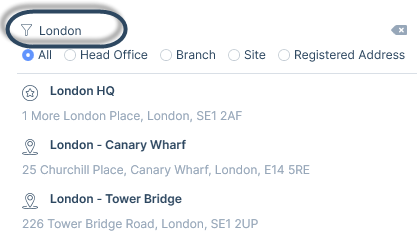
Some companies on your database may have multiple addresses, so with that in mind when assigning an address to the job, you have the ability to filter addresses, allowing you to quickly find the correct one.
If the address you wish to assign the new job to does not already exist on the company record, you create a new one (which will also be added to the company record).
You can add your job to one or more groups, including your favourites, set the maximum number of CVs the contact wants to be sent for this job and set a deadline for submission. You will receive warnings if you exceed the maximum number of CVs and/or the CV deadline has been reached (see the Submission Warnings article).

Adding a Fill Chance, which is searchable, helps you target the jobs to work first, i.e. you might want to spend your time working on those that you are more likely to fill.

Work Types, Rates, Shifts & Terms
There are three work types in itris: Permanent, Contract and Temporary. Depending on which you choose, there will be different options when completing the pay and charge fields.
When creating a job you will need to add in the Pay and Charge, which can be a range or set to zero. These can be added manually or via Global Rates (if configured), for more information on Global Rates see the Rates article.
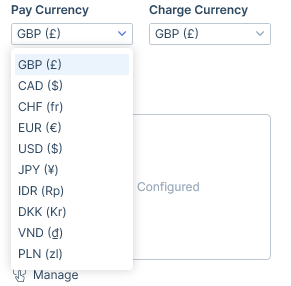
If you are creating a job in a different currency than your default, you can use the drop down to select the relevant one.
In itris there are two Rate types: Fixed and Interval Charge.
Fixed Rates Jobs
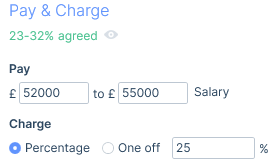
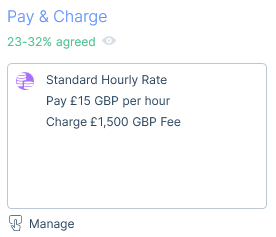
Fixed rates jobs are those where the charge rate will be a fixed fee, this includes all Permanent jobs (no matter whether the charge is set as a percentage or one off fee) and any Contract or Temporary jobs set with a One off fee.
On Contract and Temporary Jobs, when the charge is set as a One off fee the pay can be set to Hourly, Daily or Salary.
Example of a Permanent job pay and (fixed) charge.
Example of a Contract/Temporary job pay and fixed charge.
Interval Charge
Interval Charge jobs are contract and temporary jobs with an interval charge such as by hour or by day. On Interval Charge jobs you will also be able to add in Additional Rates.
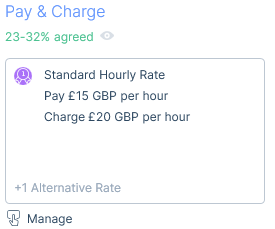
See the article Rates for more information.
Shifts
All job types will allow you to add in one or more shifts.
See the article Shifts for more information.
Terms
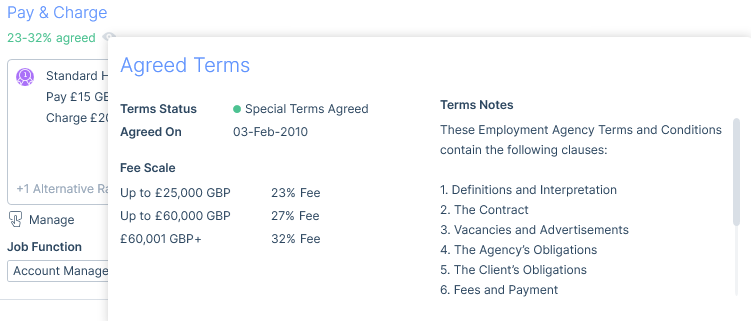
If terms exist on the company you are creating the job against you can view those details via the view (eye) icon in the Charge area. This may act as a guide to help you accurately complete the charge field.
See the article Company Terms, Fees & Rebates for more information.
Additional
Under the Additional tab you may wish to ensure the Invoice details are completed and choose to add a Purchase Order (PO) Number. If you tick to enforce the PO number, this will be required at the placement stage.
You can link your job to a previously occurred Marketing Event at the company you are creating the job against, please see the CV Marketing Hub article for further information.
Additionally, you can use the Recruitment Process area to detail all the hoops you and/or the applicants might have to jump through to fill the role.
Ticking to enable timesheet and expenses will carry forward to any placements made against this job.
Keywords
Keywords are used simply to identify a specific record, for example, you may use keywords to note specific skills or attributes required for the job. They make searching for records quicker and more efficient.
The creation and management of keywords occurs in the IMU, as this will allow you to centrally control the keyword data in itris.
See the Keyword Assignment article for more information on manually assigning keywords, ratings and Lifetimes/Obtained on.
Custom Fields
A Custom Field is a custom piece of data defined by your organisation to cater for data that itris does not accommodate. Custom Fields allow you to customise itris to work alongside your business and workflow, and are searchable fields.
Custom fields are created and managed via the itris Management Utility (IMU) Data area.
Please see the Custom Field Assignment article for more information.
Assignees
Assignees are used to associate a user or users with a record as either an Owner, Watcher or FAO (for the attention of), and are searchable.
See the Assignees article for more information.

Summary
The summary area is a blank canvas where you can make notes about the job, separate from the job description. See the Summary article for more information.
Job Description
As mentioned above, if you have created the job from the inbox using an attachment to an email, the text of this document will be automatically populated into the Job Descriptions Overview area.
If you have not created the job using the above option, you can choose to add a job description by simply creating a new overview in the overview area, or attach a document using the attachments area, this text can also be automatically populated into the Job Descriptions Overview area if you choose to do so and will overwrite any existing overview.
Job descriptions are searchable, please see the Full Text (Boolean) Searching article for more information.
Auto-Generated Compliance
Auto-Generated Compliance makes assigning compliance requirements to jobs quick and easy by suggesting the compliance items required for the job based on the Job’s Charge Type, Job Function, Industry and/or Business type of the linked Company.
Once a new job is saved you are presented with all the relevant Auto-Generated compliance options based on the data added to the new job, where you can confirm the job creation or, if you have permission to manage compliance, you can add and/or remove items as required before confirming and creating the job. See the articles Compliance | Auto-Generated Compliance and User Management | Permissions for more information.
Cancelling this form will take you back to the New Job form. If there is no matching Auto-Generated compliance this step is skipped.
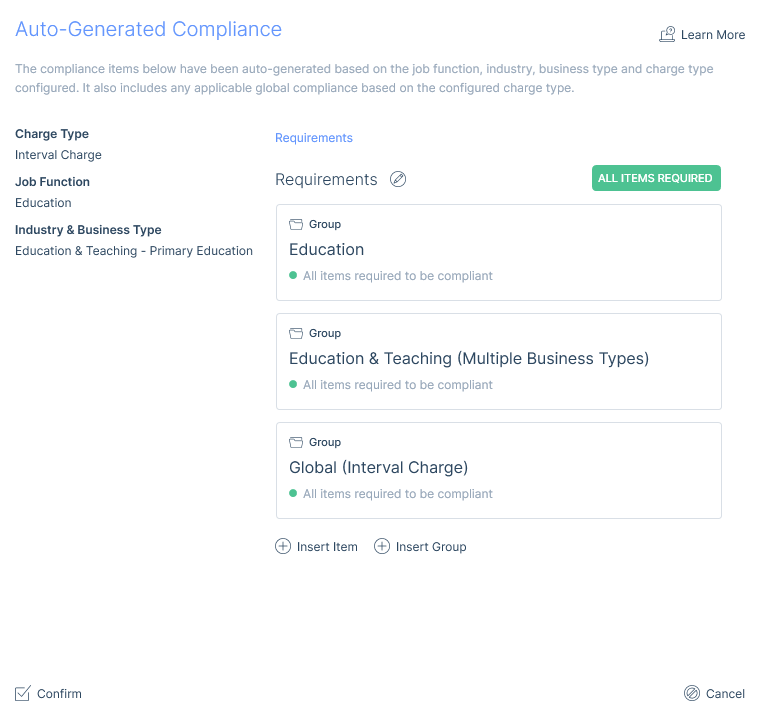
It is possible that a compliance requirement may be added more than once as part of multiple Auto-Generated Custom Field requirements being assigned. In this case, if one is satisfied, all of them are satisfied.
It is important to note that when compliance items are assigned, they are copied from the IMU, not linked. This means that any changes made at the job level will be local to the job and any changes made at the IMU/Auto-Generated Group level are not updated on the jobs that it has been assigned to.
Once assigned the compliance can be further managed via the Compliance tab on the job record. Additionally, you will also be able to re-generate compliance on an existing job when editing the Job’s Charge Type, Job Function, Industry and/or Business type of the linked Company. See the article Compliance | Jobs & Placements for more information.
Duplicating a Job
Perhaps one of the quickest ways to create a job, particularly if you already have a very similar job, is via the existing job and the Duplicate button in the Action bar. Which will copy over the job details into a New Job form once the Work Type has been selected.

You can change any of the fields that have been pre-populated, including work type and company before saving the duplicated/copied job.