
Starting Points & General Information
When making a placement you can place a single or multiple applicants. There are slight differences on the New Placement form depending on which you are doing and these are mentioned below. For more information on placing multiple applicants please refer to the Multiple Applicant Placements article.
- You can choose to create the new placement using the option in the Main Menu.
- You can create new placements via the New Record Hub, accessed via the Navigation bar (see the New Record Hub article).
- When in the process of creating any new record you can click the plus icon in the top right.
- You can create a new placement for an existing job from the action bar of an applicant, company, contact or job record
- You can create a quick placement from the action bar of an applicant, company or contact (see the Quick Placements article)
- From a relevant email in the inbox, you can choose to create a new record.
- In the submissions area of an applicant, company, contact or job record you can progress the applicant to placement.
- Quick placements can also be made from Applicant Search results and Applicant Groups (see the Quick Placements article)
- Multiple Applicant placements can be made from the Shortlist submission tabs, Applicant Search results and Applicant Groups (see the Multiple Applicant Placements article)
There are a number of mandatory fields when creating a placement record as shown below, however, you can stipulate additional fields to be mandatory in the itris Management Utility (IMU), please see the Settings | Mandatory Data article for more information.
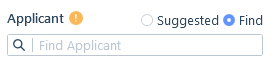
- Applicant
- Job
- Recruitment & Work Type (taken from Job). For more information on Retained Recruitment placements, please see the article Retained Recruitment.
- Work Capacity
- Company (taken from Job)
- Contact (taken from Job)
- Address (taken from the job, however if you wish to assign an address that does not already exist on the company record, you create a new one here which will also be added to the company record)
- Job Title
- Pay (zero allowed)
- Charge (zero allowed)
- Filled By
- Start Date
- End Date (if Work Type set to Contract or Temporary)
- Shifts
- PO Number (if the Job or Company is set to require one)
When creating a new placement from anywhere other than the job, you will need to select the job you are making the placement against. When doing this you will have the ability to choose from a suggested list (for example on an applicant record this will suggest any live job to which the applicant was submitted) or Find the relevant job using the job name or ID number.
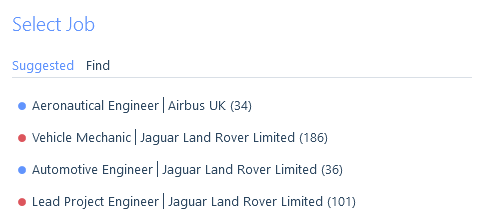
When creating from a job record, the suggested list of applicants will be the records you have most recently been into.
Alternatively, you can use the Find option which lets you search by the applicant’s ID number or name.
There may be times when you search for a record and you’re unsure if the correct one appears in the record find list. In these cases, you can use the Advanced Record Find. With Advanced Record Find you can perform an advanced find for such scenarios which will provide some more in-depth criteria as well as a record card, so you can be sure that you’ve found the record you were looking for before navigating to it. Please see the Record Find Control article for more details on using the Advanced Find.
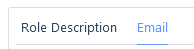
If the job you are creating the placement against has a job description this will automatically be added to the placement as the Role Description.
Creating a placement from an email
When adding a placement record from an email, you will get an additional tab in the creation window called Email, from here you can drag and drop (or copy and paste) data into the new placement window. This will be useful if the contact has included information about working times, pay & charge, notice period etc.
Details
There is a plethora of data fields available in the details area, much of which will have been pre-populated from the job, and includes searchable data such as Work Capacity (Full or Part Time), Work Arrangement (On-site, Hybrid or Remote), Job Function, Department, and Filled by. Additionally, you can add the notice period, placement reason and add your placement to one or more groups, including your favourites.

Work Type, Rates & Shifts
There are three work types in itris; Permanent, Contract and Temporary. Depending on which type the placement is, there will be different options when completing the pay and charge fields.
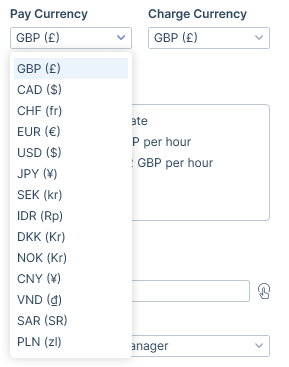
When creating a placement you will need to add in the Pay and Charge, which can be a range or set to zero. These can be added manually or via Global Rates (if configured), for more information on Global Rates see the Rates article.
If you are creating a placement in a different currency to your default, you can use the drop down to select the relevant one.
In itris there are two Rate types: Fixed and Interval Charge.
Fixed Rate Placements
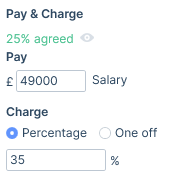
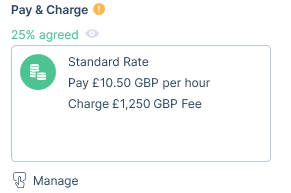
Fixed rate placements are those where the charge rate will be a fixed fee, this includes all Permanent placements (no matter whether the charge is set as a percentage or one off fee) and any Contract or Temporary placements set with a One off fee.
On Contract and Temporary placements, when the charge is set as a One off fee the pay can be set to Hourly, Daily or Salary.
Example of a Permanent placement pay and (fixed) charge.
Example of a Contract/Temporary placement pay and fixed charge.
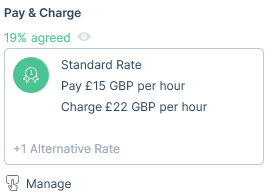
Interval Charge Placements
Interval Charge placements are contract and temporary placements with an interval charge such as by hour or by day. On Interval Charge placements you will also be able to add in Additional Rates.
All placements types will require you to add in one or more shifts.
See the articles Rates and Shifts for more information.
Terms
If terms exist on the company you are creating the placement against you can view those details via the view (eye) icon in the Base Charge area. This may act as a guide to help you accurately complete the charge field.
See the article Company Terms, Fees & Rebates for more information.

Notice Period
Upon saving a new placement, the applicant’s Availability and Notice Period are updated as follows:
Permanent Placements:
- Notice Period: Set to that of the new placement. Any existing value is removed if no notice period is set on the placement.
- Availability: Remove any existing value.
Temp / Contract Placements:
- Notice Period: Set to that of the placement. Any existing value removed if no notice period is set on the placement.
- Availability: Set to the day after the end date of the placement.
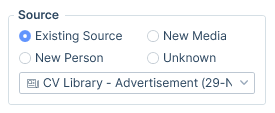
Source
When placing applicants, the source linked to the applicant’s submission, or if there is no source linked to their submission then their latest source will be pulled through to the placement. When placing a single applicant it can of course be changed, or added if there is not an original source. If multiple applicants are being placed the source cannot be changed when making the new placement but the source can be changed post creation on the placement record. Sources can be reported on to track Return on Investment via the Source Report (see the Sources Report article).
Additional
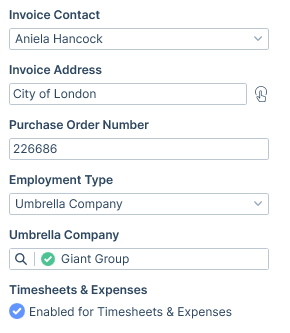
Under the Additional tab you will need to ensure the Invoice details are completed and choose to add a Purchase Order (PO) Number. Note in some cases the PO number may be a mandatory field depending on what has been set against the job.
For any Interval Charge placements, you can add the Employment type and link those relevant to either a Trading Entity or an Umbrella Company where relevant (see the Trading Entities and Umbrella Companies articles). If there is a default Employment Type set on the Applicant record, this will populate here and can be changed if required. Additionally, these can be enabled the for timesheets and expenses.
If you are making Multiple Applicant Placements the information you can add here will be limited, please see the Multiple Applicant Placements article for more information.
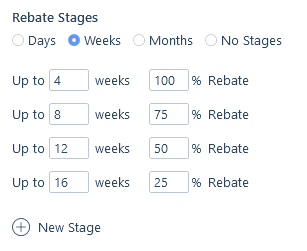
For Fixed Fee placements you can set the Rebate Stages, these are reported on in your Dashboard (see the Dashboard | Active Business Intelligence article) to help you keep track of potentially “at risk” finances, you can also search on placements by their rebate stage.
Split Fees
Adding split fees allows you to recognise each user that has had a role in making the placement, and will feed through to the users’ Dashboard (see the Dashboard | Active Business Intelligence article).

Keywords
Keywords are used simply to identify a specific record, for example, you may use keywords to note specific skills or attributes required for the placement. They make searching for records quicker and more efficient.
The creation and management of keywords occurs in the IMU, as this will allow you to centrally control the keyword data in itris.
See the Keyword Assignment article for more information on manually assigning keywords, ratings and Lifetimes/Obtained on.
Custom Fields
A Custom Field is a custom piece of data defined by your organisation to cater for data that itris does not accommodate. Custom Fields allows you to customise itris to work alongside your business and workflow, and are searchable fields.
Custom fields are created and managed via the itris Management Utility (IMU) Data area.
Please see the Custom Field Assignment article for more information.
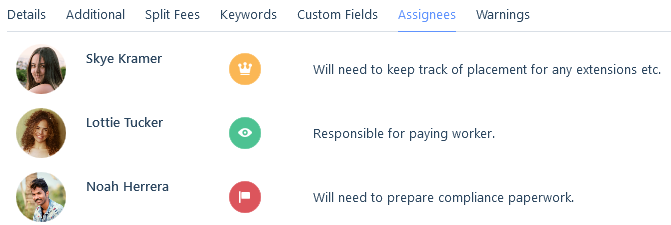
Assignees
Assignees are used to associate a user or users with a record as either an Owner, Watcher or FAO (for the attention of), and are searchable.
See the Assignees article for more information.
Warnings
Warnings exist to inform or prevent a user from carrying out an action at various levels of applicant submission and will flag up any issues of potential reasons why the user should be warned of something. This could potentially save you from a damaging or embarrassing situation. See the Submission Warnings article for more information.
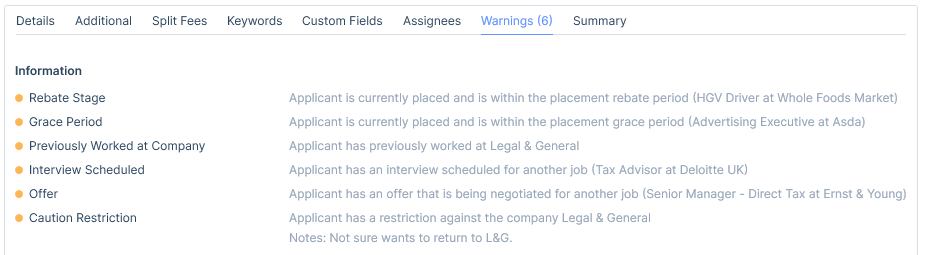
If you are placing multiple applicants at the same time this will show warnings for each applicant. Please see the Multiple Applicant Placements article for more information.
Summary
The summary area is a blank canvas where you can make notes about the placement. See the Summary article for more information.
Creating the record
When you have entered all the mandatory details and any additional information, you will be able to create your placement record. If any fields require validation or mandatory fields have not been completed the Validation (exclamation mark) icon will show.

Post Creation Options
There are three post creation options: open the placement record, send confirmation emails or create the applicant as a contact against the company. The later two options are only available with single applicant placements.
You can set your default for this option in your itris preferences, please see the itris Preferences article for more detail.
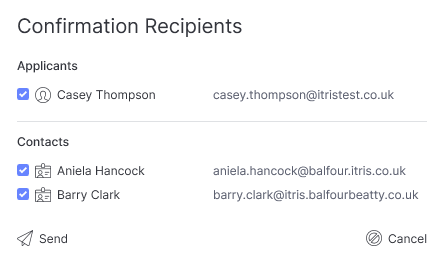
Send email confirmation
Send email confirmation allow for emails to be sent to the applicant and/or relevant contacts (Main Contact, Line Manager and Invoice Contact). Once the placement is saved you will be able to chose whom to email. A maximum of two emails will open, one to the applicant and one to the contacts.
Once in the email form(s) you can either select an email template or write your email.
Create as Contact
If the applicant you are making the placement for will also be a contact at the company, you can tick to create them a contact record, that will be linked with their applicant record.
Once you confirm the creation of the placement, the New Contact window will open, displaying the link. See the New Contact article for further information.
