
Introduction
Adding timesheet and expense data against placements not only allows you to export that data for payroll purposes, it will also mean a more accurate Estimated Value calculation for each placement. The updated Estimated Value will be shown on the placement record and throughout itris in the various reports and searches displaying this data.
Placement Records are enabled for Timesheets & Expenses via the Additional tab, and once enabled the Timesheets & Expenses tab will become available.

Timesheet and expense data can then be added to the placement, either via the placement record itself or via the Timesheet Hub (please see the Timesheets Hub & Report article).
Timesheet & Expenses Tab
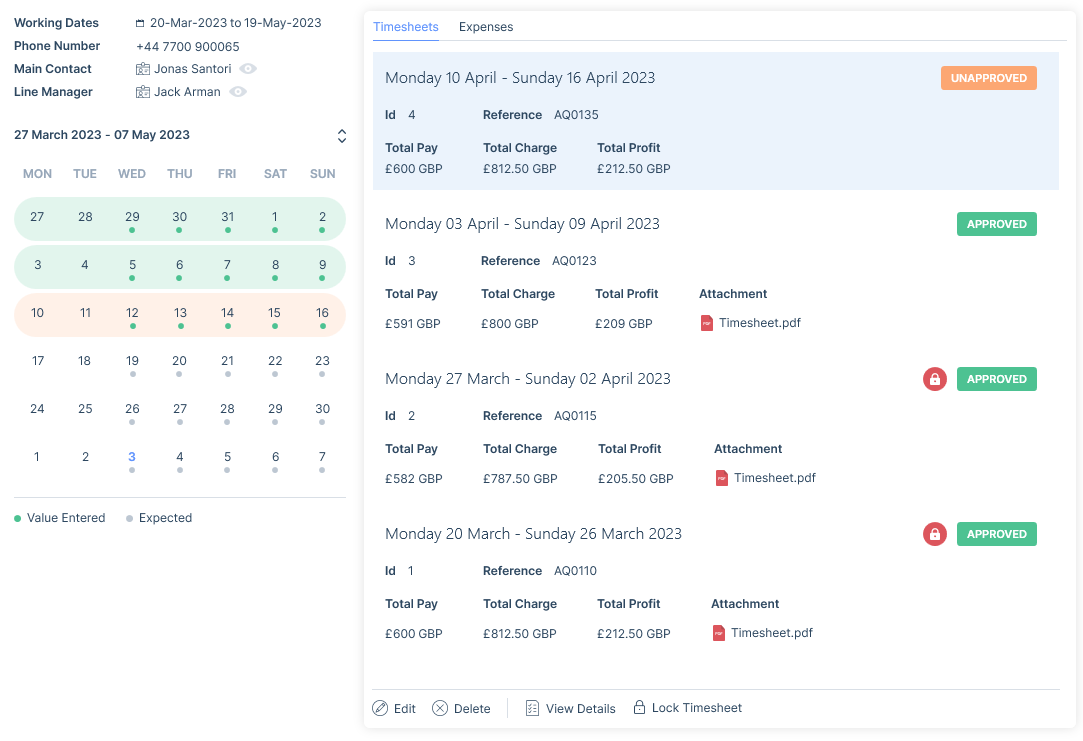
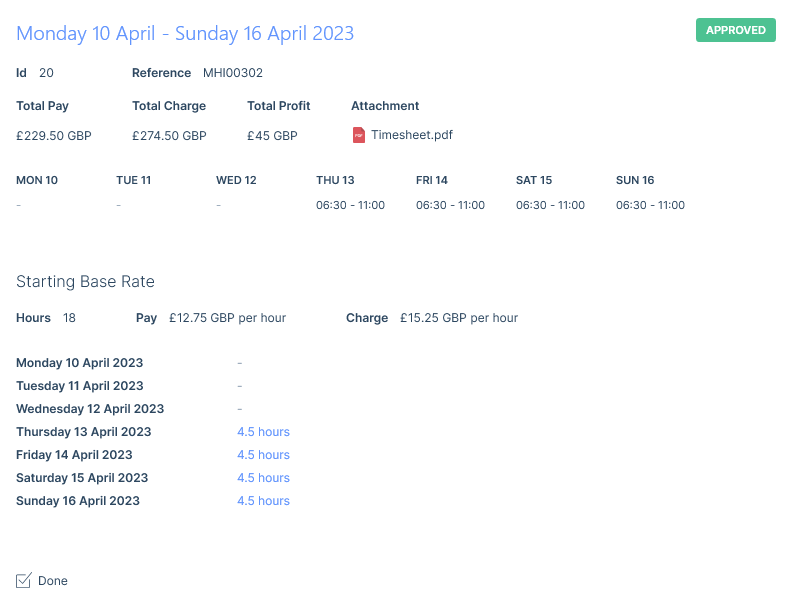
On the placement record, under the Timesheet & Expenses tab, the mini-calendar (on the left) shows a summary of where timesheet data is expected, where it has been added and the status of added timesheets.
- Timesheet periods with an approved status will show highlighted in green.
- Timesheet periods with an unapproved status will show highlighted in orange.
- On the days a timesheet entry is expected but has not been added a grey ellipse is displayed.
- You can scroll through the calendar to past or future dates using the up and down arrows.
The days displayed in the calendar are based on the timesheet period that is set in the IMU, please see the Settings | General Settings article for more information.
On the right, you will see a snapshot of Timesheets and Expenses that have been added to the record, as well as actions you can perform on these entries.
Adding a New Timesheet
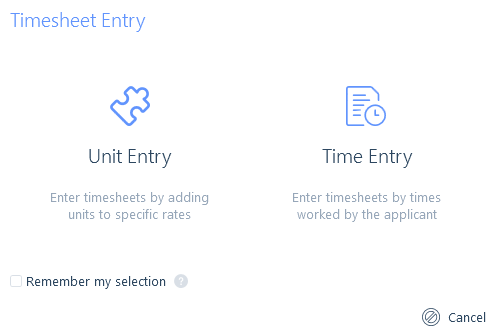
Timesheets are added via the Calendar by clicking on the relevant timesheet period. There are two possible methods available for entering timesheet data: Unit Entry or Time Entry.
Your default option can be set in your itris Preferences (see the itris Preferences article) or set here by ticking to remember the selection. Alternatively, you can choose a method each time you enter data.
Unit Entry mode is used for adding units (e.g. 8 hours / 1 day) to specific rates within the timesheet’s period.
Time Entry mode is used for adding working times (e.g. 0800-1700) to specific days and then automatically to the applicable rates, or times can be manually added against the relevant days and rates for the timesheet period.
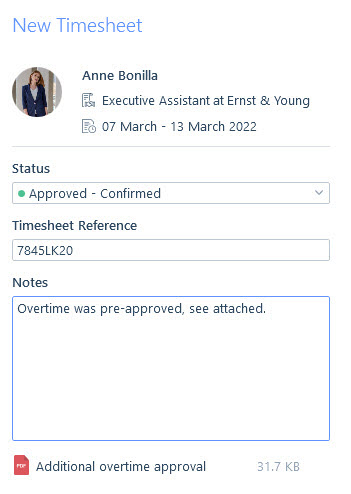
With both options, the timesheet entry form will show details of the placement on the left-hand side, including start and end dates, a drop-down menu to choose the status of the timesheet, space for a timesheet reference (for example if provided by the client), a notes section and an attachment area (for the original signed timesheet file, for example).
Once a timesheet is saved the pay and charge values from the rate are locked into the timesheet and therefore any changes to the rate on the placement records will not affect the values shown on previously added timesheets (unless the timesheet is fully edited after the rate is changed, see Editing Timesheets below).
Please note that the pay/charge interval (e.g. hourly or daily) is not locked into the timesheet and therefore what is shown/applied to the timesheet will be a reflection of the current state of the rate on the placement. However, this won’t affect the financial values as the pay/charge values and the number of units by which they are multiplied are still a reflection of what they were when the timesheet was originally created.
Saved timesheets are displayed on the Timesheet Card.
Unit Entry
In Unit Entry mode the placement’s rates will show in the order of Base Rates and then Alternative Rates (see Rates article for more information) that are valid for the timesheet period selected. This is dictated by the start and end dates applied to the rates on the placement. If there is more than one base rate valid for the timesheet period these will be ordered by the effective date ascending, and then the same for alternative rates.
For each rate, the start and end dates will be shown, along with the pay, charge, times/days applicable, and either the Base (green) or Alternative (orange) Rate icon.
Where notes have been added to the rate this will be displayed above the pay and charge information.
Shaded days/times denote the rate is not expected on those days/times based on the rate and shift data on the placement, however, time can still be added to these if needed.
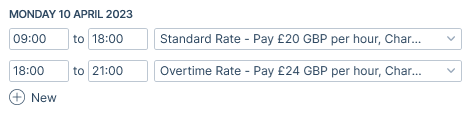
Using the example below a shift has been applied to the placement that covers Monday to Friday (e.g. not weekends) from 9am-5pm, but the overtime rate does not start until 6pm. Therefore the weekends and the alternative rate will show as shaded as they are outside of the shift.
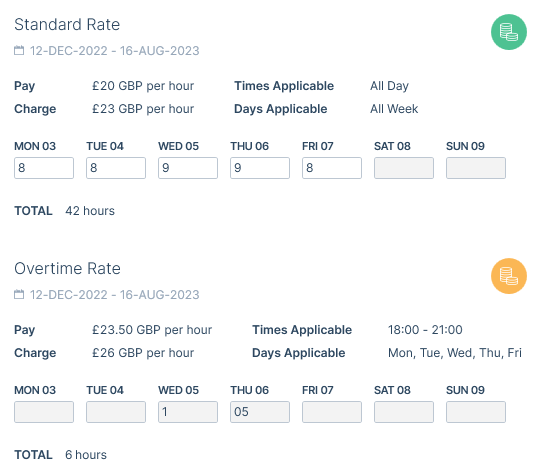
Where an applicant is being paid an hourly rate, the hours worked are entered against the appropriate rate (e.g. 8 hours), and where an applicant is being paid a daily rate a 1 can be added to denote one day’s work. You can also add in decimals for part hours/days. When using decimals 0.25 will equal a quarter-hour (15 mins) for hourly rates, or a quarter of the day for daily rates.
To allow for scenarios where you might want to add all the hours/days worked for one week under one day (e.g. all added to a Sunday) you are able to add any numerical figure into the fields.
Time Entry
In time entry mode you are specifying the actual start and end times of the shifts that were worked.
One Rate
If there is just one rate on the placement that rate will be shown next to the time entry fields.

Multiple Rates
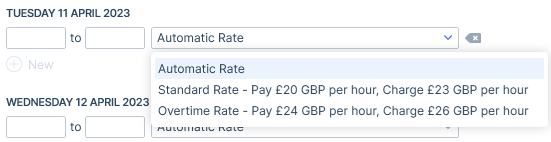
If there are multiple rates on a placement the timesheet entry form will show Automatic Rate. This means that you simply have to input the start and end times that the applicant worked and itris will automatically assign the relevant hours to the correct rate based on the times/days added to each rate.

Once the timesheet is saved, if you then edit the timesheet entry you will see that itris has assigned the relevant times to the relevant rate.
If you wish, you can manually enter the rates against the relevant times using the drop-down list.
Here the rates will be ordered by Base Rates and then Alternative Rates (see the Rates article for more information) that are valid for the timesheet period selected. This is dictated by the start and end dates applied to the rates. If there is more than one base rate valid for the timesheet period these will be ordered by the effective date ascending, and then the same for alternative rates.
Timesheet Card
The Timesheet card displays information related to the selected placement’s timesheets and this includes tabs for the Timesheet History and Expenses.
Timesheet History
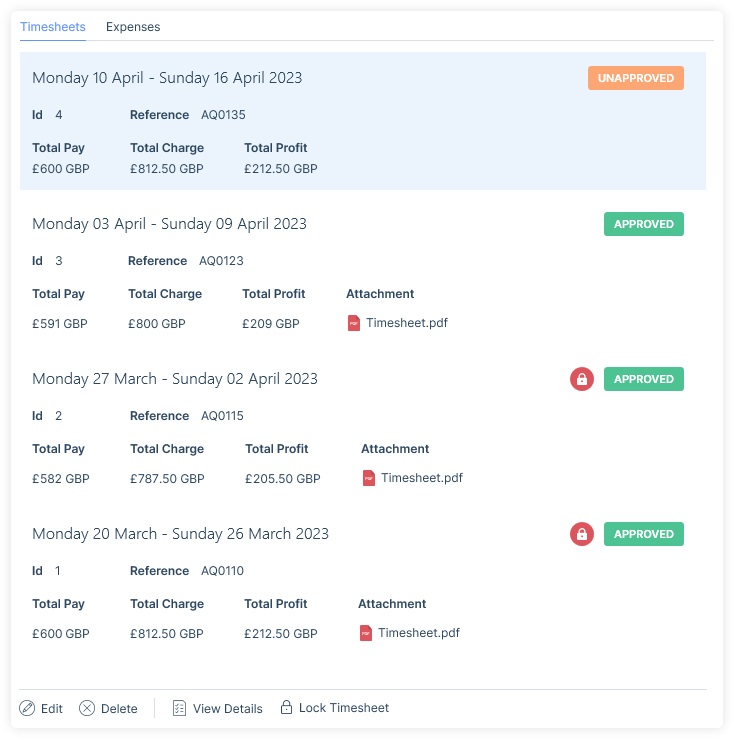
Previously saved timesheets display here ordered by timesheet start date descending (so that the most recent timesheet is at the top) and each shows a short summary of that timesheet and whether or not it is locked.
Editing a timesheet
If a timesheet is unlocked (see below) you will be able to edit it. This will be the same form (e.g. either Unit or Time Entry) in which the original timesheet was entered.
However, if a rate of the placement has been updated since the timesheet was added, then when editing you can choose to either edit the properties (such as status, reference, attachment and notes) without refreshing the pay and charge values, or you can choose to edit the timesheet values.
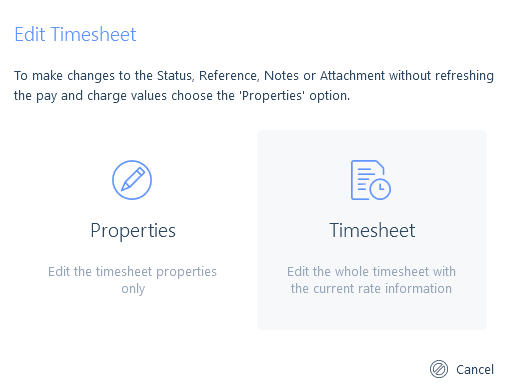
Properties
If Properties is selected, an edit form will display with just the properties for the timesheet. This includes the Placement Details, Status, Reference, Notes and Attachment.
Timesheet
If Timesheet is selected, the full timesheet form will be available for edit, this includes the properties and the time entered (in the mode in which it was initially entered e.g. either Unit Entry or Time Entry).
Please note, when editing a timesheet if time has been added against a rate that has since been edited on the placement, the new information will refresh onto the timesheet when saving the edit.
Deleting a Timesheet
If you have permission to do so you can delete timesheets (see the User Management | Permissions article for more information). Timesheets can only be deleted if they are unlocked (see below).
View Details
View details is a read-only summary of the timesheet details entered, including the start and end times if Time Entry mode was used to add the timesheet.
Locking/Unlocking
A timesheet can be set to Locked to denote it has been paid and/or exported to an external payment system for processing (see the Timesheets Hub & Report article for more information).
Only timesheets with an approved status can be locked. Locked timesheets can’t be edited or deleted.
Additional Useful Timesheet Information
Deleting Rates: if a rate has been used in a timesheet you will be unable to delete it from the placement.
Switching Work Types: if timesheets exist against a placement you will be unable to switch it from an interval payment placement to a fixed fee placement.
Expenses
The Expenses tab within the Timesheet Card lists any expenses related to the placement record. These are ordered by the Incurred on date descending (so that the most recent expense is at the top of the list). The list will display details of the expenses including whom it is to be paid by, type (e.g. reason for the expense), status (approved/unapproved), date incurred and whether it is locked. You can also add notes and an attachment.
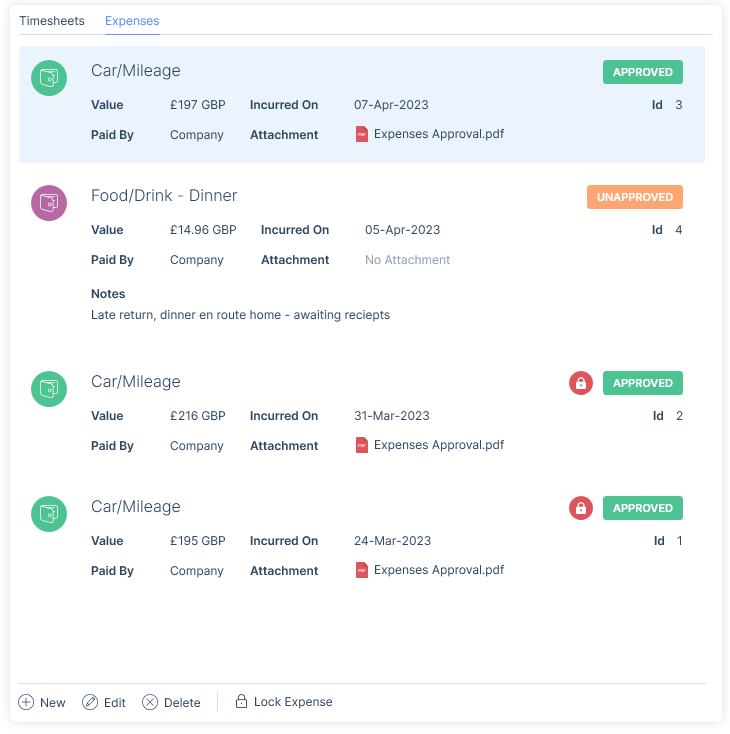
As with timesheets only approved expenses can be locked and may be used to denote it has been processed/paid. Locked expenses can not be edited or deleted.
When an expense is set as Paid by Agency (e.g. yourselves) the value of the expense is deducted from the placement’s estimated value.