

Introduction
Record Groups are available for each record type and are accessed from a central area via the Navigation Bar.

Applicant groups might be used to group applicants that have particular skills or qualifications or perhaps those that you deem to be the best/most highly skilled. This way, when a job comes you can go straight to the relevant applicant group for a ready-made shortlist of applicants.
Similarly, contact groups might be used for contacts that generally provide jobs for the same type of applicants, or they might be used as collections of contacts in the same sector, relative location, etc. that you might Market CV’s to.
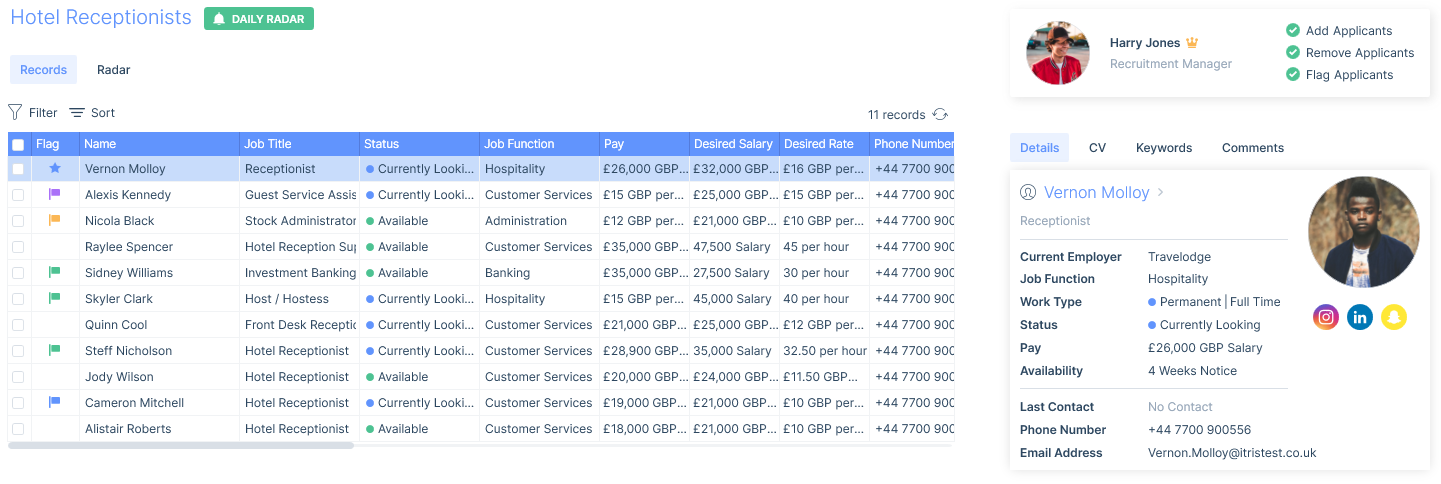
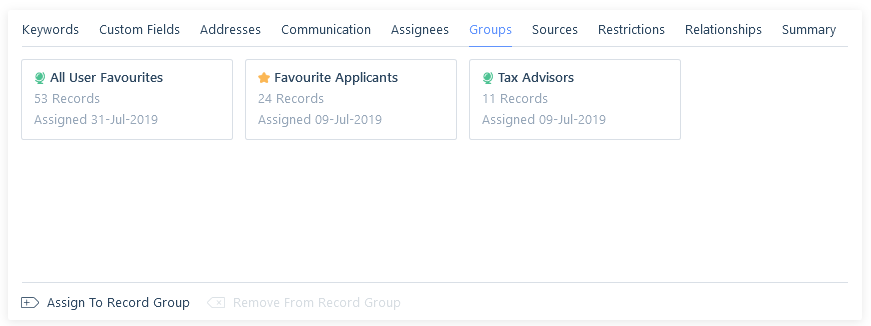
In the Record Groups area, you will see all the groups which you have access to and the records belonging to each group. To the right the side panel will display tabs showing the selected records Record Card, Keywords, Comments (most recent 30), and for applicants their CV.
From the Record Group area you can create new groups; add and remove records from a group; flag records in a group; and share groups you have created. Additionally, in the Record Groups area, if any changes have been made elsewhere whilst a group is being viewed there is a refresh button to update the group.
Types of Groups
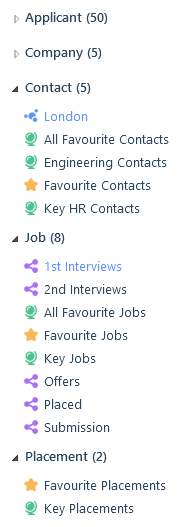
There are 4 different types of groups you have access to; global groups, personal groups, shared groups and favourites.
Global

Personal

Shared

Favourites

Adding Records to Groups
Records can be added to groups from a number of different places.
Adding records from within the Groups area
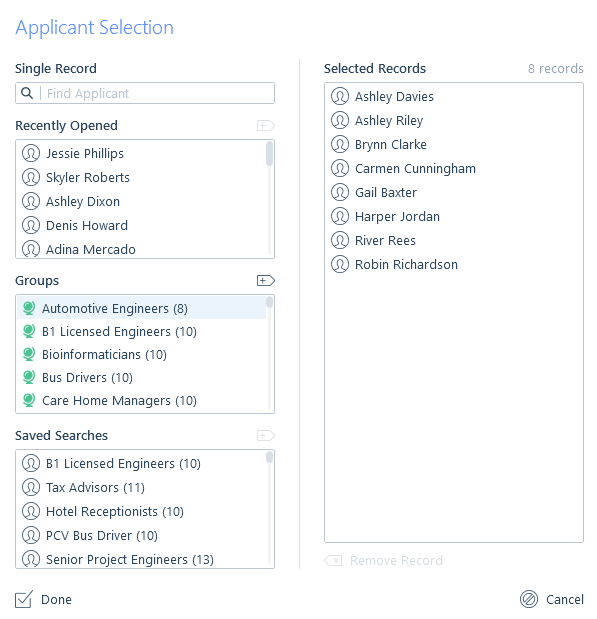
When adding to a group this way the Selection window gives you a number of options;
- Find a single record
- Select from recently opened records
- Add records from an existing Group (in effect copying the group)
- Add records from a Saved Search
- Any combination of the above
Adding Records from a Search
Additionally, you can assign records directly from your search results, see the Managing Search Results article for more information.
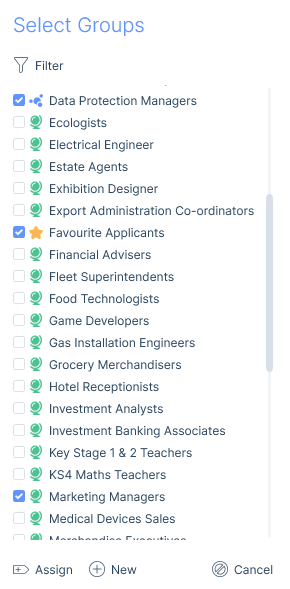
When assigning a record to a group, you will be given the choice to assign it to more than one group including favourites.
Adding from a record
Each record type also has a Groups tab within the Information area on the record itself where you can see all the groups that a record belongs to and add to or remove from groups.
Applicant Records Added via Radar
On applicant groups, you can set up Group Radars to help keep them up to date. Group Radar matches recently created applicant records to your groups so that your groups are easily updated with the newest applicants in the system. See the Group Radars article for more information.
Action Buttons
At the foot of each Group there are a number of actions that you can complete. These will differ slightly depending on the record type you are viewing, for example on the job and placement groups you will not have the action buttons related to submissions and placements.

Here you can choose to Go To the selected record, email the group members, Quick Place applicants, convert the Group to a focused Search and more. See the following articles for more information: Bulk emailing, Sending SMS, Posting to Integrations, Converting & Focused Searches, Submissions Area, Quick Placements, New Placement, Comments, New Appointments, Data Exports.
Bulk Actions (adding/remove Keywords, adding Comments, updating Status, applying Assignee capacity and managing Access Groups) can be applied to Groups. See the Bulk Actions article for more information.
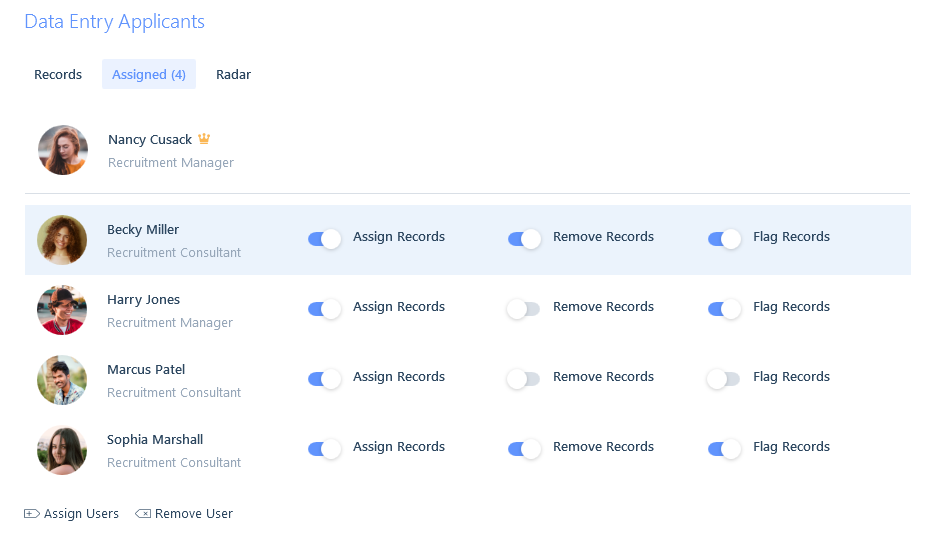
Sharing a Group
To share a group with another user, you must be the owner of the group. If you share a record group with a group name that clashes with another user, itris will show a number next to the name in the same way as duplicated filenames in Windows. Permission to assign and remove records from the group can also be set against each person you are sharing the group with.
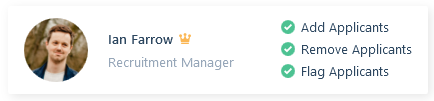
When a group is shared with you you will see the permissions you have in the top right of the screen.
Groups can be shared (and unshared) from the Assigned tab, and permissions toggled on/off for each user the group is shared with.
Searching in a Group
Searching within a group is particularly useful as it provides the ability to further refine records returned to those that match the criteria needed and are within the group. So if for example, you have a cherry-picked group of high-quality Site Engineers, searching within the group could be of use to find those that reside within a specific area or perhaps have additional qualifications etc. You can search on Record Groups from either the group’s window or by selecting within a new search.
Clicking Search from the Groups window will auto-populate the Record Group field within the Searches form. For example, if you are searching within a Contact Group called ‘Key Contacts’, this will open the Contact Search form with the group ‘Key Contacts’ populated in the Group field.

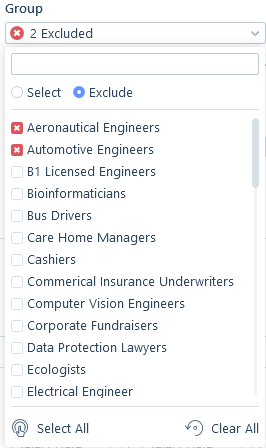
When choosing to search within a group you can choose to search within one or more groups via the Searches form. These will only be groups you own or are shared with you. Therefore, the records returned will match the search criteria and exist in any of the selected groups.
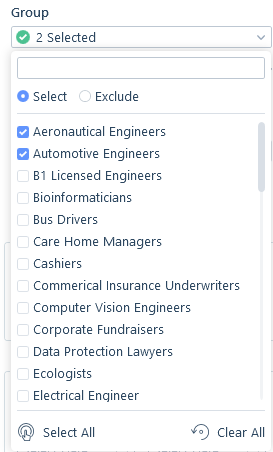
Additionally, you can choose to exclude all of the records within a group from a search by selecting the Exclude option and then the groups you wish to exclude. These will only be groups you own or are shared with you. Again a record will be excluded from the search results if it exists in any of the excluded groups.
Show/Hide Groups
There may be occasions where you have been assigned to multiple global groups that are not of interest to you, however, may come of use in the future. As you are unable to remove yourself as an assignee to a group, you have the option to show or hide them.
When hovering over a group the eye icon will appear to the right, this will allow the group to be toggled as Hidden or Shown.
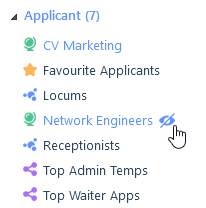
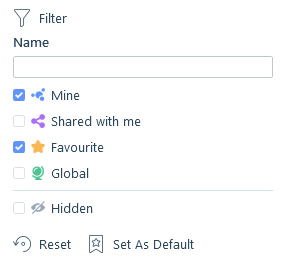
By default, hidden groups will not appear in the list. However, you have the ability to show them by using the filter. Hidden groups will appear in grey within the list.
Changes made to the filters can be saved as your default filter criteria by Set As Default or unsaved filter changes, changed back to the default filters via Reset.
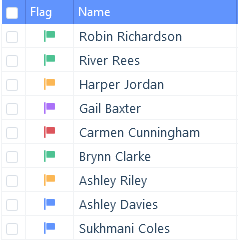
Flagging Records
Flagging records is an effective way of organising your group, for example, the good and the bad.
There are 5 different coloured flags you can label with.
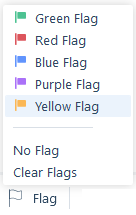
If you are a fan of shortcut keys you can use these to flag the results: Green Flag = 1, Red Flag = 2, Blue Flag = 3, Purple Flag = 4, Yellow Flag = 5, No Flag = 0 (e.g. remove flag)
Filter & Refresh
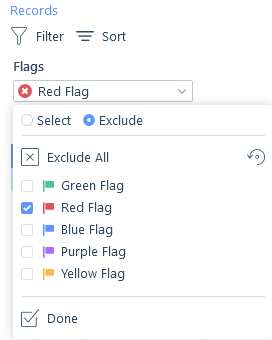
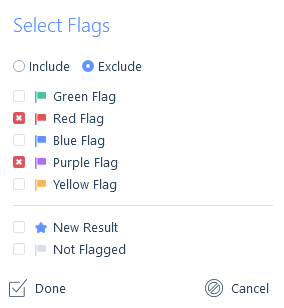
The filter allows you to include/exclude records by Flags and archive status. Additionally you can set a Default for the Filter (though we would advise setting flags as part of the default).
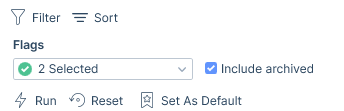
For example, if you have labelled all the really good applicants with a green flag you can show only those, or if you want to hide some applicants, for example, those you’ve added a red flag to you can use the filter to exclude them.
Where you have a large number of records in a group the list will be paged. If you are filtering by flags it is recommended to Refresh the current page before moving to the next page.
Refreshing the current page will update both the page counts and the records on that page. For example, if there are 5 records Flagged Red, and you filter to Exclude Red Flagged records, when Refreshing (and hiding these Red Flagged records) itris will bring records 5 records from the subsequent page to the current page.

When actioning flagged records, there is the option to include or exclude certain flags. In the example below, I am wanting to send an email to all of the records excluding the red and purple flags.
Sort Options
Each record type has its own sort options.
Applicant
- Assigned On
- Id
- First Name
- Last Name
- Job Title
- Created On
- Last Contact
- Next Scheduled Contact
- Latest Original CV
- Employer
- Quick Note
- Availability
- Pay (currency agnostic, will sort on the numerical value only)
- Desired Salary (currency agnostic, will sort on the numerical value only)
- Desired Rate (currency agnostic, will sort on the numerical value only)
Company
- Assigned On
- Id
- Company (Name)
- Created On
- Last Contact
- Next Scheduled Contact
- Quick Note
Contact
- Assigned On
- Id
- First Name
- Last Name
- Job Title
- Created On
- Last Contact
- Next Scheduled Contact
- Company
- Quick Note
Job
- Assigned On
- Id
- Job Title
- Created On
- Start Date
- Job Title
- Company
- Fill Chance
- Value
Placement
- Assigned On
- Company
- Id
- Job Title
- Company
- Created On
- Start Date
- End Date
- Applicant (Name)