Our Top itris Preferences
There are too many useful itris preferences to narrow it down to a Top Ten, so here’s our Top 14!
We also couldn’t decide on our favourites, so they are in no particular order.
Top Tip 1 - Main Record Configuration
This area allows you to customise the layout of itris to help you easily access the areas most useful to you, streamline your workflow and increase your productivity.
Additionally, you can turn tabs on and off and move the order of tabs within the particular areas (containers) in which they sit.

Top Tip 2 - Pop Out Search Results
Popping out your search results into a separate window that you can resize means you can move the search results window around on your screen (or onto a second screen if you have one) and view both the results and the selected record at the same time.
You have all the same functionality on the pop out screen that you have on the docked version.

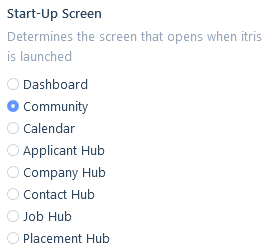
Top Tip 3 - Start Up Screen
Choose which window itris loads when first opening so that the most important information to you is displayed first.
This might be the Dashboard so you can see data currently relevant to you in terms of your pipeline, or the Calendar so you can view what lies ahead, the Community board so you can see important messages or maybe one of the record hubs.
Top Tip 4 - Default Work Types
If you work one type of job more than any other why not set it as your default work type.
This way, when you create a job the default work type will already be selected for you.

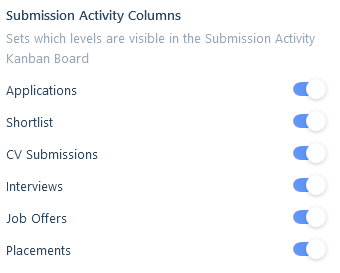
Top Tip 5 - Submission Activity Columns
Here you can set which submission levels (lanes) will show on a job record’s Job Activity tab.
The Job Activity board is a quick and easy way to manage applicants through the submission process by dragging them from one level to another.
Top Tip 6 - User Profile
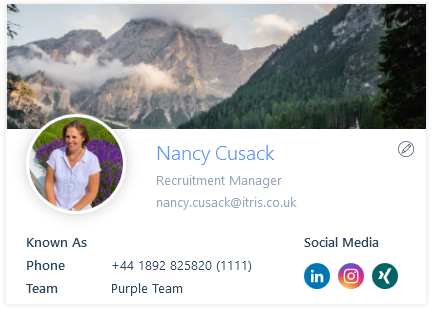
Take ownership of your User Profile with a picture of yourself, a background image and your social media links.
In turn these will then show on your user record card for you and other users to see.
For example if you are the filled by person on a placement users can click your image and see your record card.
Top Tip 7 - Map View
When displaying addresses on a map, whether that’s from a Geolocation Search or from the address areas on records you can opt to have the map show either embedded in itris, or open via your default web browser (e.g. Chrome, Edge etc).

Top Tip 8 - Comment Reader View
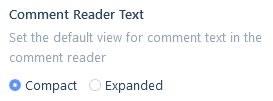
Decide how you want to view comments in the comment reader (that’s the bit to the side of comments on the comments tab).
Where comments are longer you can select to have a compact view with a Show More option so you see more comments, or have them all expanded to show all comment text.
Top Tip 9 - Community Default Audience
Posting to the community hub is a great way to collaborate with your colleagues, whether that’s sharing job records to get assistance filling them, making a company announcement or letting people know about an event.
Audience allows you to choose who will see your post, so if (by default) you only want selected users, teams and/or groups to see your posts you can set them as your default audience.

Top Tip 10 - CV Highlight Text
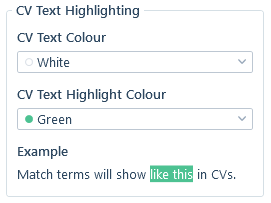
If you run an applicant search where you use the CV Text searching, the words/phrases that you search on will be highlighted in the Original CV tab.
Here you can choose the colours for the highlight.
Top Tip 11 - Calendar Views
Do you prefer to see your Calendar in Month, Week or Day view?
Here you can also set your working week days (including start day or the week) and your working times.

Top Tip 12 - Email Signature
Set for your email signature to be added by default when sending emails from itris.
Don’t worry, if you have more than one email signature you can still change it on the email before sending.

Top Tip 13 - Executing Email Merges
When using email templates (either personal or global) that use merge fields, to save you clicking each time to execute the merge, have itris do it for you automatically.

Top Tip 14 - Google Search when adding a new Company record
When adding a company, once you’ve added a company name itris will run a google search for that company.
You can then view their website, twitter account, LinkedIn account etc and use any relevant information to complete the company record.
For example, you can drag over their company logo to be their itris profile picture, drag and drop (or copy and paste) the ‘about us’ information into the Summary tab or simply cross-reference their address.
